If you are a System administrator and assigned a task to upgrade the packages for one application running on an EC2 instance, but due to some security restrictions, you are not permitted to access production instances via SSH or bastion host. In this situation, you can use AWS Systems Manager to remotely run shell scripts or certain commands to update packages on EC2 instances. In this blog, we will cover everything you need to know about AWS Systems Manager and how to use it!
In this blog, we will cover:
- What is AWS System Manager and how does it work?
- What are its benefits?
- What is SSM Agent, Run Command, and SSM Document?
- AWS Systems Manager capabilities
- Who can use AWS Systems Manager?
- Companies using AWS Systems Manager
- Hands-on – Run commands remotely on an EC2 Instance using AWS Systems Manager
- Conclusion
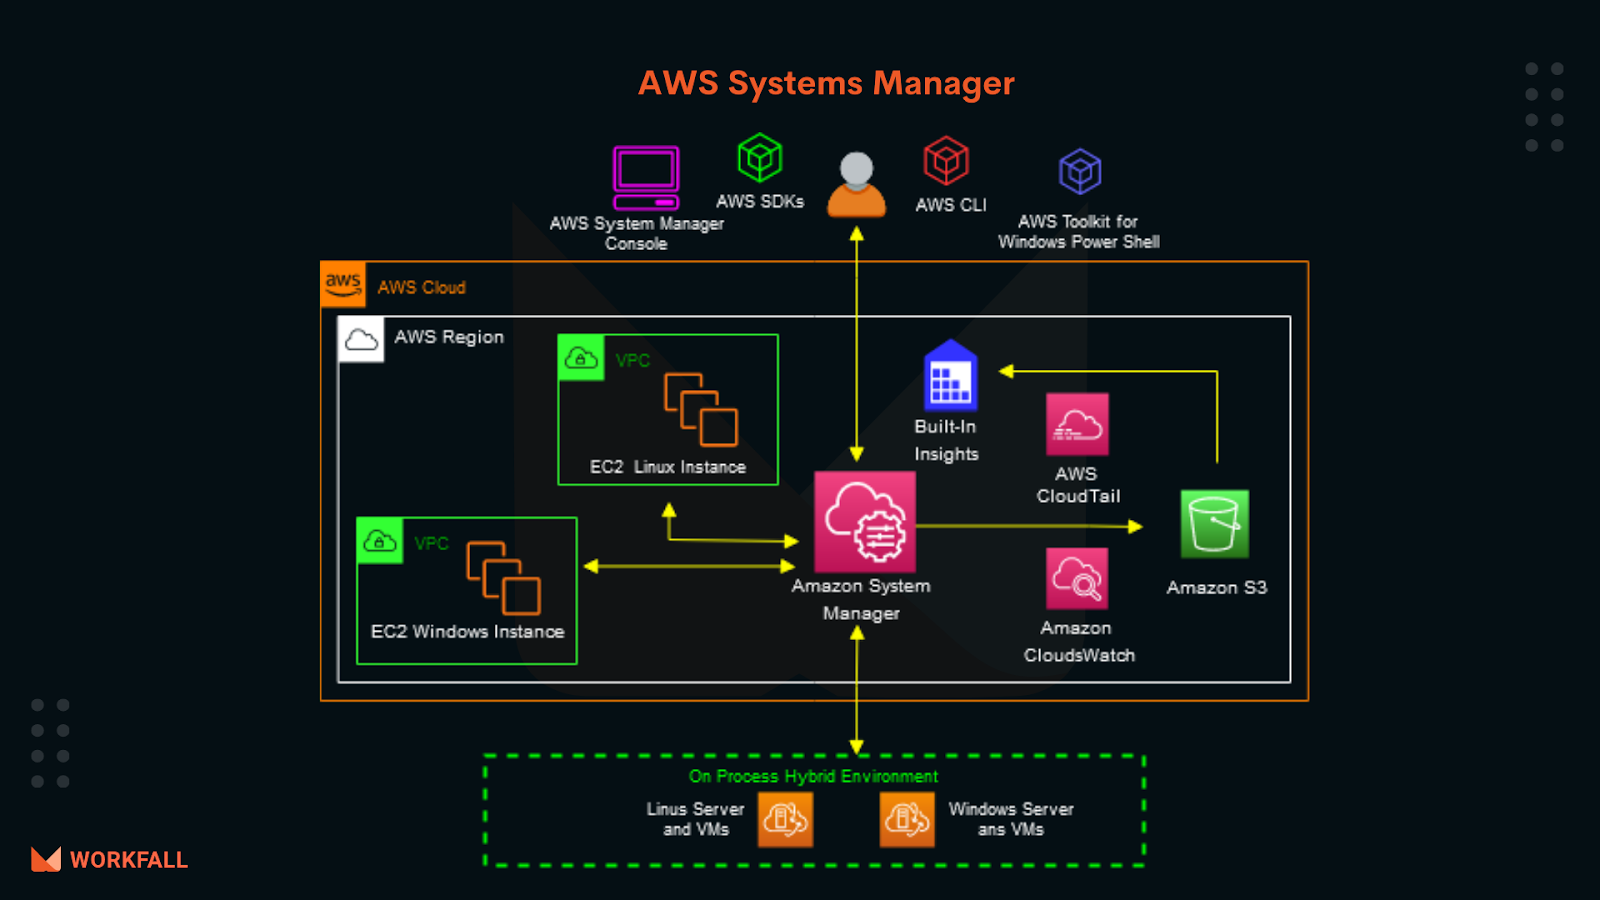
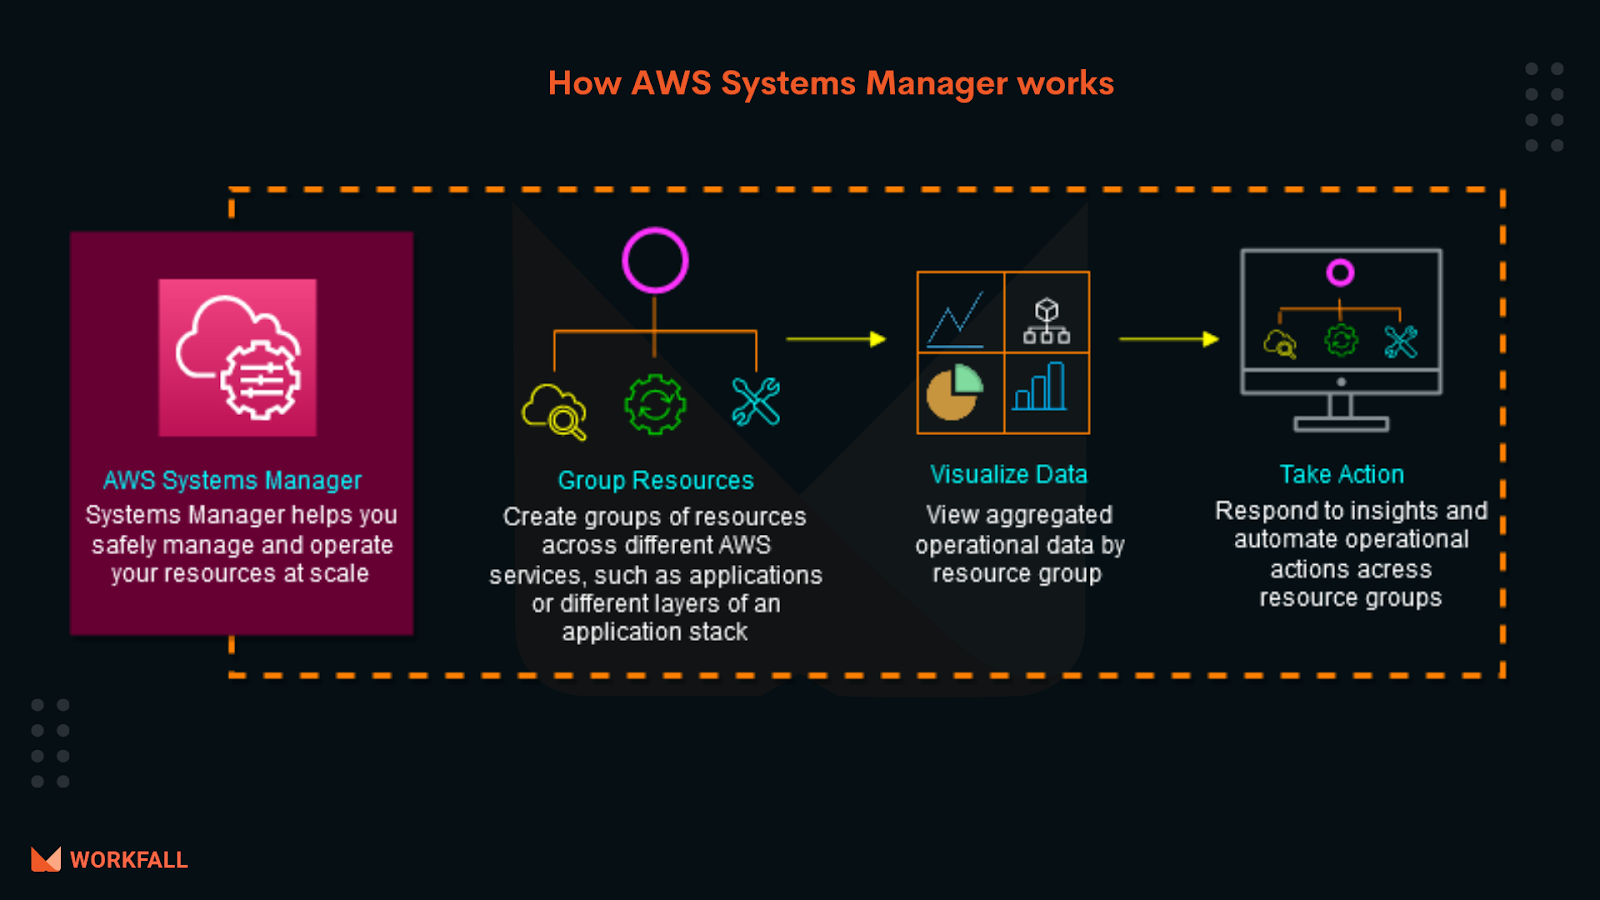
What is AWS Systems Manager and how does it work?
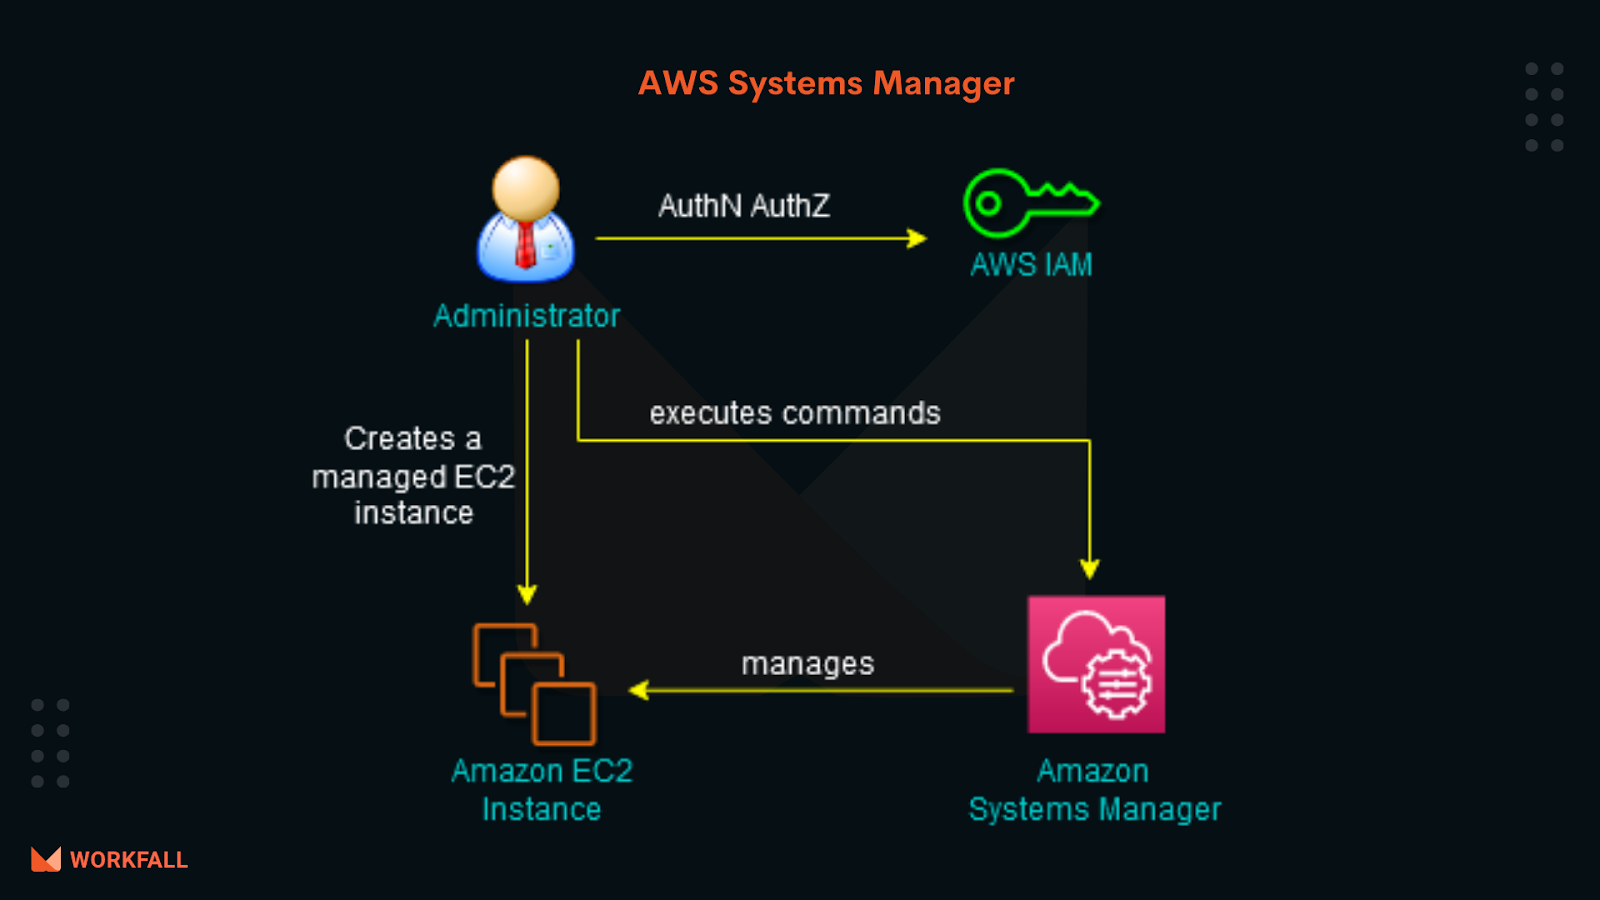
AWS Systems Manager provides its users visibility and control of their infrastructure on AWS. It has a unified user interface so one can view operational data from multiple AWS services and lets the user automate operational tasks across AWS resources. Systems Managers, can group resources, like Amazon EC2 instances, Amazon S3 buckets, or Amazon RDS instances, by application, view operational data for monitoring and troubleshooting, and act on groups of resources. Systems Manager has simplified resource and application management, shortened the time to detect and resolve operational problems, and made it easy to operate and manage infrastructure securely at scale.
What are its benefits?
Hybrid Environment Management
AWS System Manager helps you manage resources for Windows, Linux, and Mac operating systems running on Amazon EC2 or on-premises. It offers you a consistent administrator experience across your servers, making it easier to configure and audit logs, manipulate registry keys, navigate file systems, update user access permissions, and monitor critical metrics.
Quick problem detection
Quick view operational data for groups of resources, lets you identify any issues that might impact applications that use those resources. Systems Manager presents the operational data for your resource groups in a single, easy-to-read dashboard so you don’t have to navigate to other AWS consoles.
Security and Compliance Maintenance
Systems Manager provides a centralized store to manage your configuration data, whether it’s plain text, such as database strings, or secrets, such as passwords. You can remotely manage your servers at scale without manually logging in to each server. And define patch baselines, maintain up-to-date anti-virus definitions, and enforce firewall policies.
Easy Automation
Use predefined automation runbooks which have rich text descriptions, so you can reduce human error and simplify maintenance and deployment tasks on AWS resources and build your own to share for common operational tasks such as stopping and restarting an EC2 instance. Systems Manager also has built-in safety controls, allowing you to incrementally roll out new changes and automatically halt the roll-out if errors occur.
Improve Visibility and Control
Systems Manager is integrated with AWS Config and lets you easily view changes across your resources as they occur over time.
What is SSM Agent, Run Command & SSM Document?

SSM Agent
- It is software that can be installed and configured on an EC2 instance, an on-premises server, or a virtual machine (VM).
- Makes it possible for the Systems Manager to update, manage, and configure these resources. It must be installed on each instance to use with the Systems Manager.
- Usually, it comes preinstalled with a lot of Amazon Machine Images (AMIs), while it must be installed manually on other AMIs, and on on-premises servers and virtual machines for your hybrid environment.
Actions that are performed by SSM on your instances are defined by the Systems Manager. SSM documents support JSON and YAML, which includes parameters which are steps and specifications that come into action when it encounters a failure injection. SSM documents allow you to do the following –
- Create and save different versions of your documents and specify the default version for each SSM document.
- Tag your SSM documents for better identification.
- Share documents by making them public or to share with specific AWS accounts.
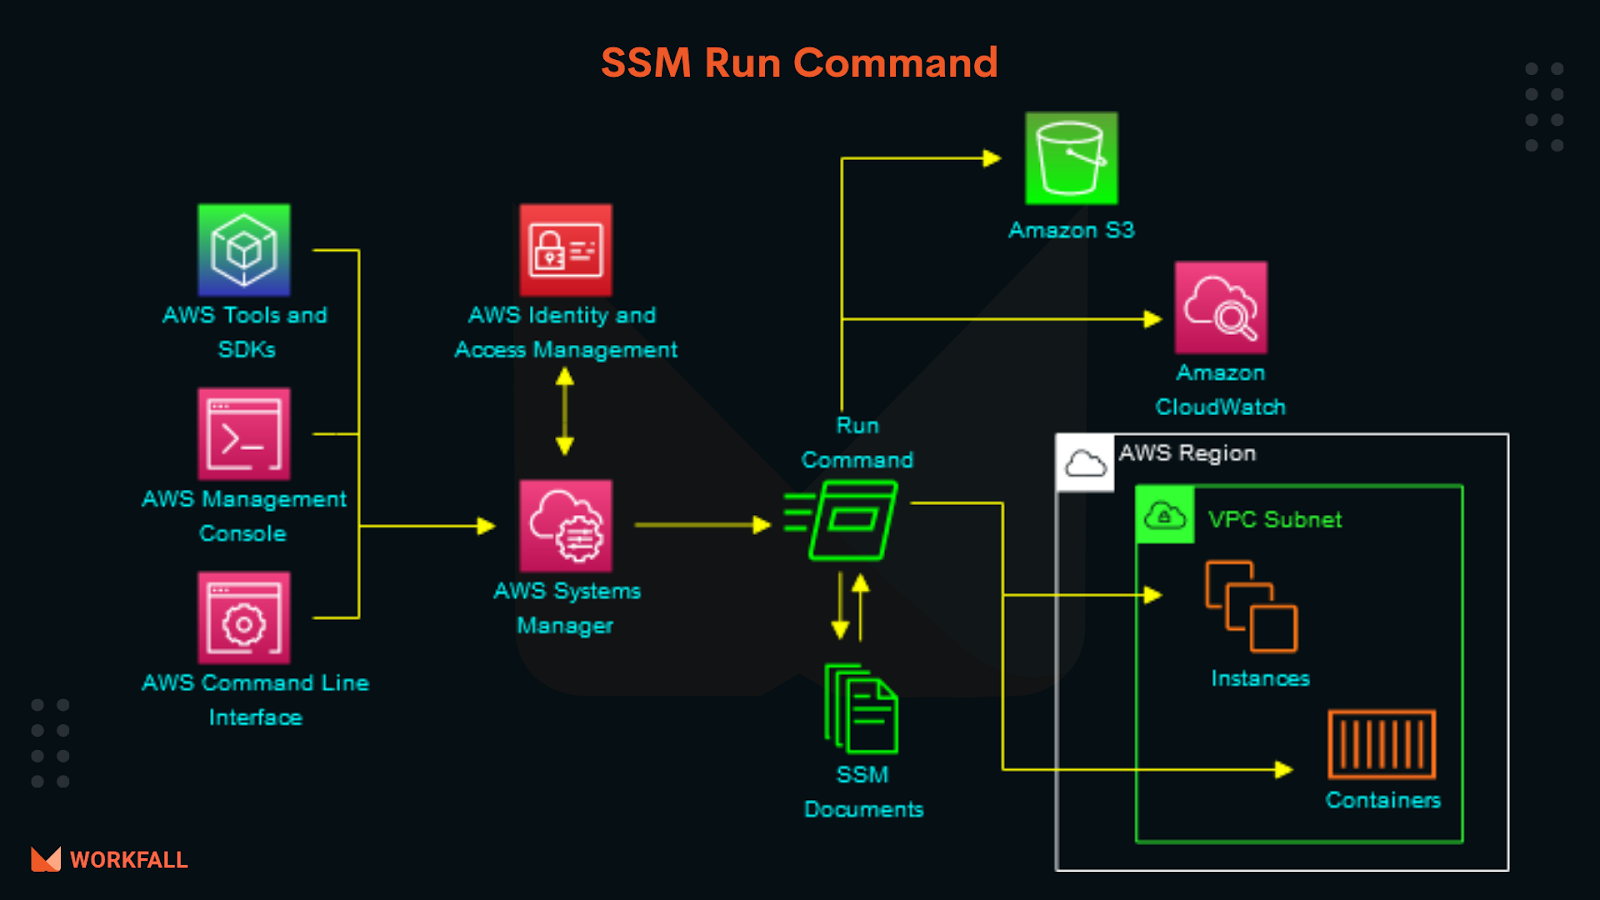
Run Command
Run Command helps us remotely and securely manage the configuration of EC2 instances. It also helps in configuring hybrid environments like on-premises servers and virtual machines (VMs) and even VMs in other cloud environments.
Run Command allows you to automate DevOps tasks and in performing ad-hoc configuration updates, regardless of the size of your fleet.
Run Command is mostly used for installation or bootstrapping applications, capturing log files, or joining instances to a Windows domain.
SSM Document
An SSM document defines the actions that the Systems Manager performs on instances. SSM documents use JSON or YAML format, and they include steps and parameters that need to be specified to perform failure injection.
AWS Systems Manager Capabilities
- Operations Management – Manages AWS resources by CloudWatch Dashboards, OpsCenter, Resource Groups, Trusted Advisor, and Personal Health Dashboard (PHD)
- Shared Resources – Involves Systems Manager Documents (SSM), Parameter Store (for configuration data)
- Actions and Change – Used for Automation and Maintenance
- Instances and Nodes –For EC2, provides Configuration, Compliance, Inventory Management, State Management, Patch Management
Who can use AWS Systems Manager?
The key feature of System Manager is to make multiple roles can be performed easily. Hence, this service can be used by:
- System administrators
- Software developers
- Security architects
- Cloud architects
- IT professionals who would like to manage AWS resources.
Companies using AWS Systems Manager
Hands-On
Imagine a scenario wherein you are assigned tasks by your team lead to upgrade the packages for your application running on your EC2 instances. Due to some security restrictions, you are not permitted to directly access your production instances via SSH and are not even allowed to use the bastion hosts. In this situation let’s use Amazon Systems Manager to remotely run your shell scripts or certain commands to update packages on your EC2 instances.
To implement this, we will do the following:
- Navigate to the Amazon IAM console and create a new role to give Systems Manager permission to perform actions on your instances.
- Navigate to the Amazon VPC console and enable auto assigning of public IPv4 addresses.
- Open the Amazon EC2 console and create a new managed instance with the newly created IAM role.
- Connect to your instance via EC2 Instance Connect and check if the SSM agent is installed on your EC2 instance.
- Open the Amazon Systems Manager console and upgrade the SSM agent on the instance by Automating the upgradation process via the Fleet Manager dashboard in Amazon Systems Manager, and/or Manually running a pre-packaged command known as a document via Run Command in Amazon Systems Manager
- Run a Remote Shell Script to update packages on managed EC2 instances via execution of a Linux command on the Run Command dashboard in the Amazon Systems Manager console.
Login to your AWS account on the AWS console and navigate to the IAM console to get started.
Click on “Roles” under the “Access management” section on the left navigation pane.
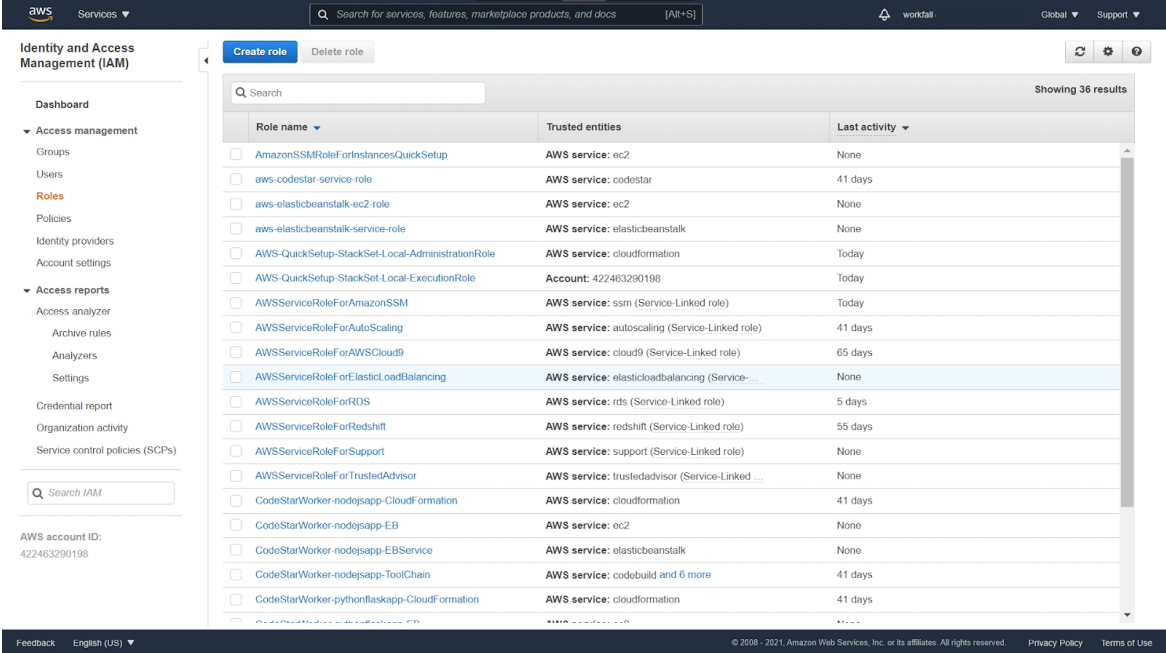
Click on “Create role” to create a new role. You will use this role to give Amazon Systems Manager permission to perform actions on your instances.
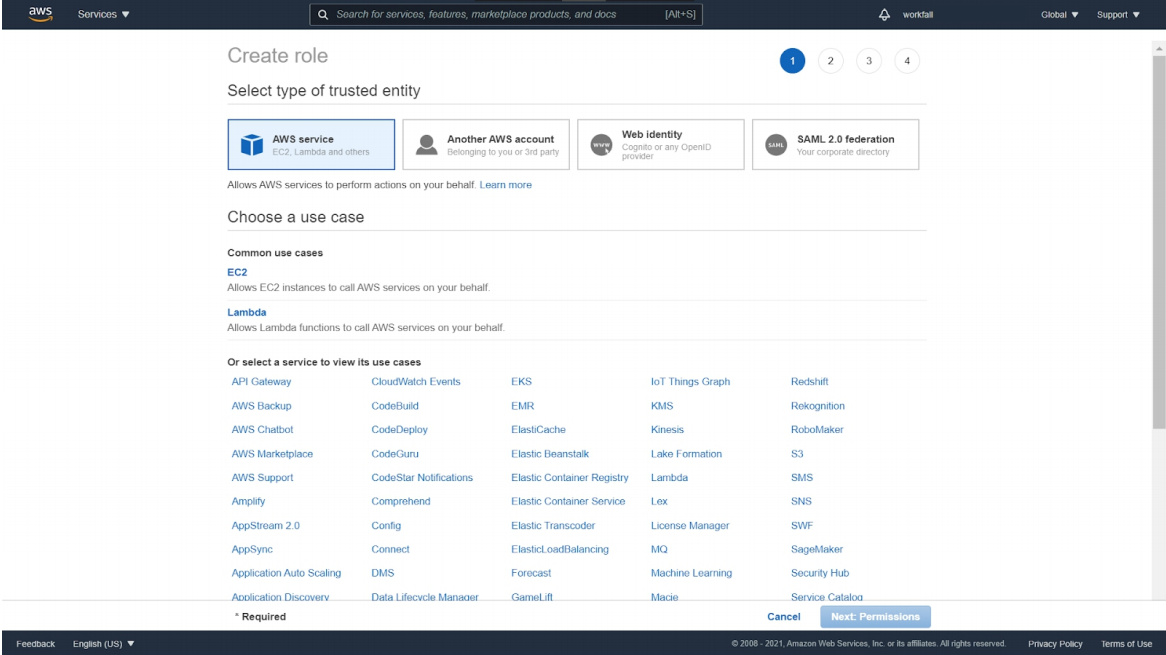
Select “EC2” under the “AWS service” section and then click on “Next: Permissions”.

Search for the “AmazonEC2RoleForSSM” policy and click on the checkbox to add the policy to the role.
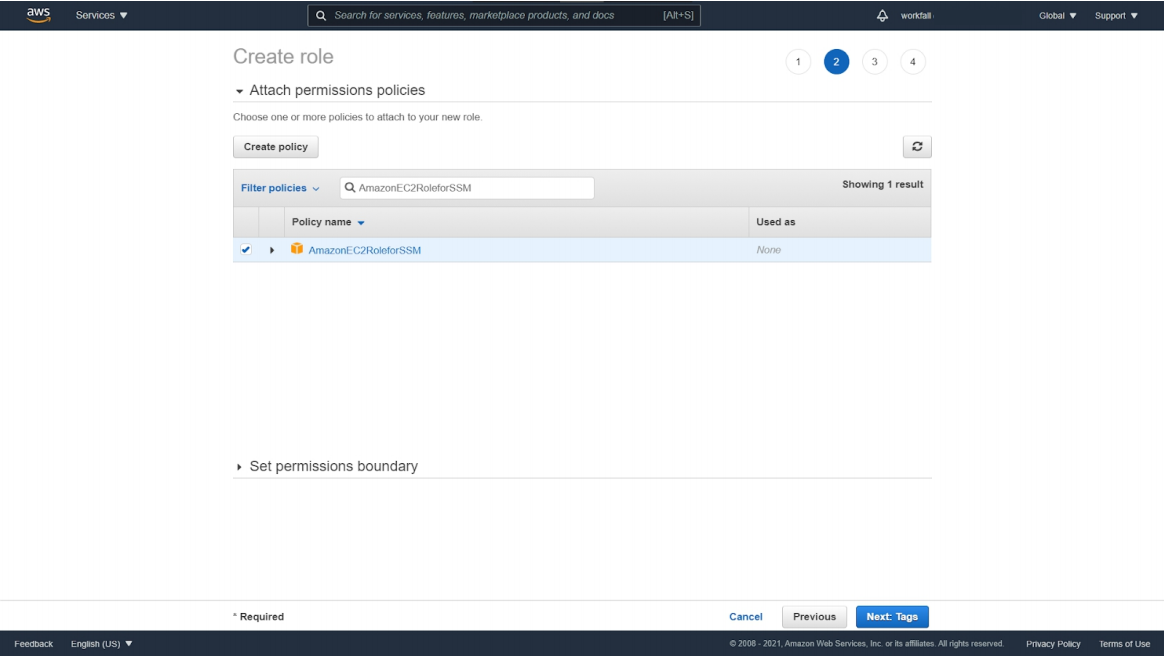
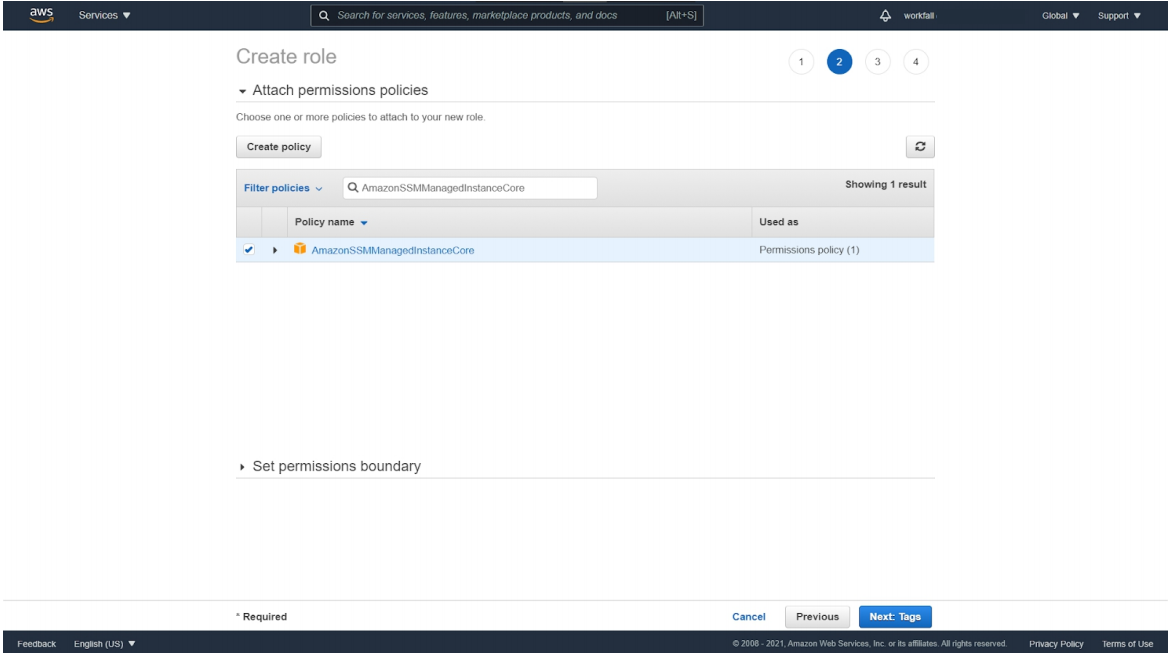
Now, search for the “AmazonSSMManagedInstanceCore” policy and click on the checkbox to add the policy to the role. Once done, click on “Next: Tags”.
Add tags (if any). For this tutorial, we will not be adding any tags.

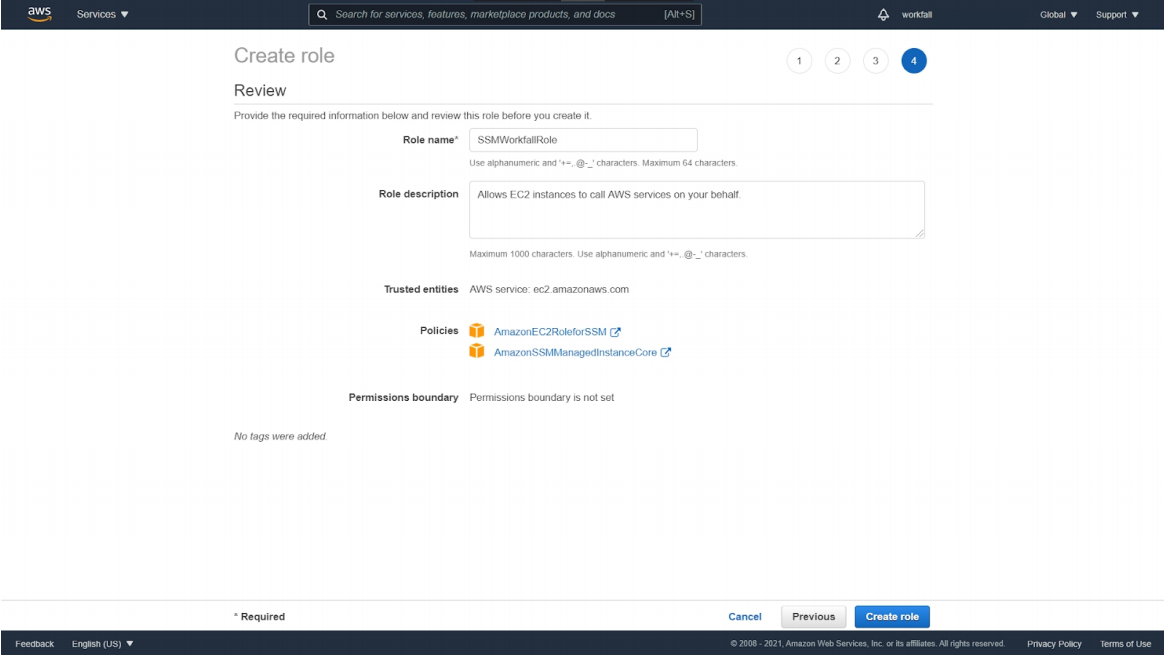
Once done, click on “Next: Review” and enter a name for the newly created role and description (if any). AWS provides you with a default description. Review the policies attached and click on “Create role”.
On creation of the role, you can type in the role name in the search bar on the Roles dashboard to verify if the role has been created successfully.

Next, you need to ensure that your subnet has the “Enable auto-assign public IPv4 address” checked (enabled). This is to be ensured since you will have to connect to your EC2 instance to make sure the SSM agent is installed on your instance. Without the public IPv4 address, you will not be allowed to connect to your instance.
To enable/verify it, navigate to the Amazon VPC dashboard.
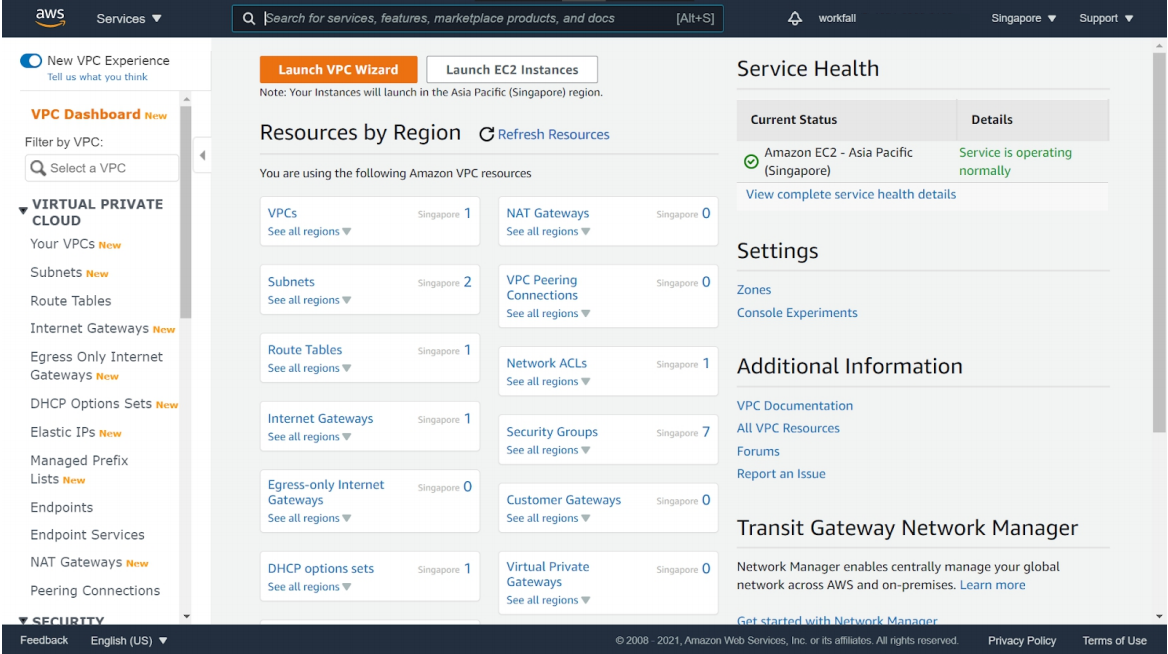
Click on “Subnets” on the left navigation pane under the “Virtual Private Cloud” section.

Select your subnet in which you will be creating your instance and click on “Actions”.
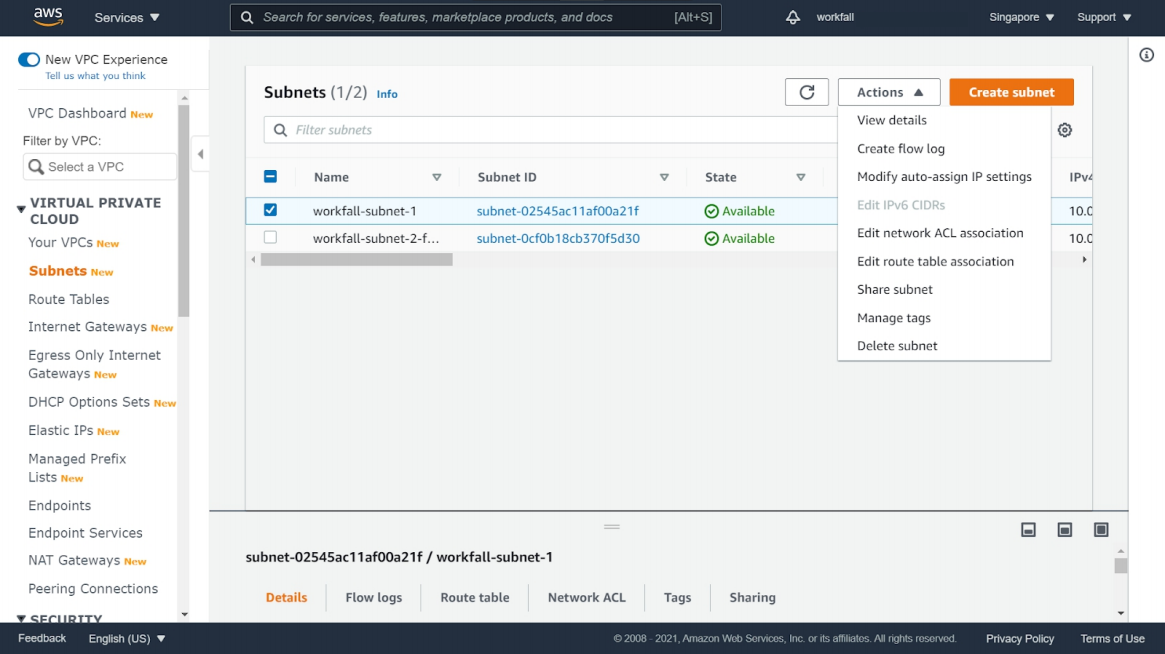
Select “Modify auto-assign IP settings”. Ensure that the checkbox for “Enable auto-assign public IPv4 address” is checked and click on “Save”.
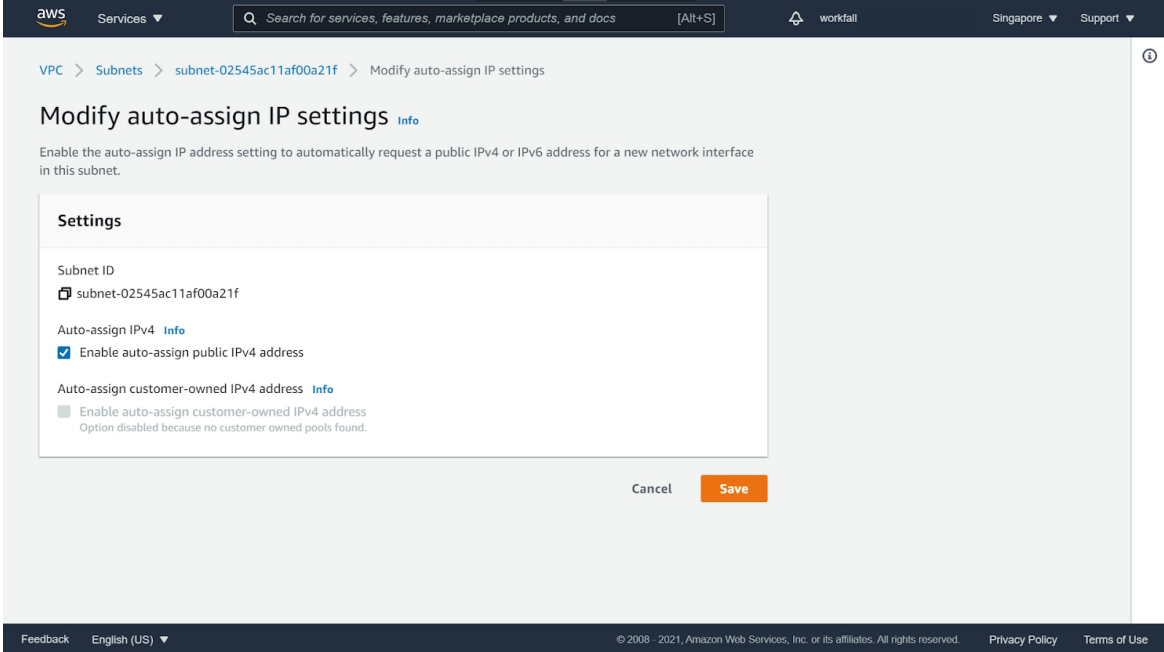
On success, you will get a success message as shown in the below image.

Next, we will create an EC2 instance using the role that we created above. This will help us create a managed EC2 instance that will be managed by the Amazon Systems Manager.
Navigate to the Amazon EC2 console and ensure that the preferred region is selected in which you want to create your instance.
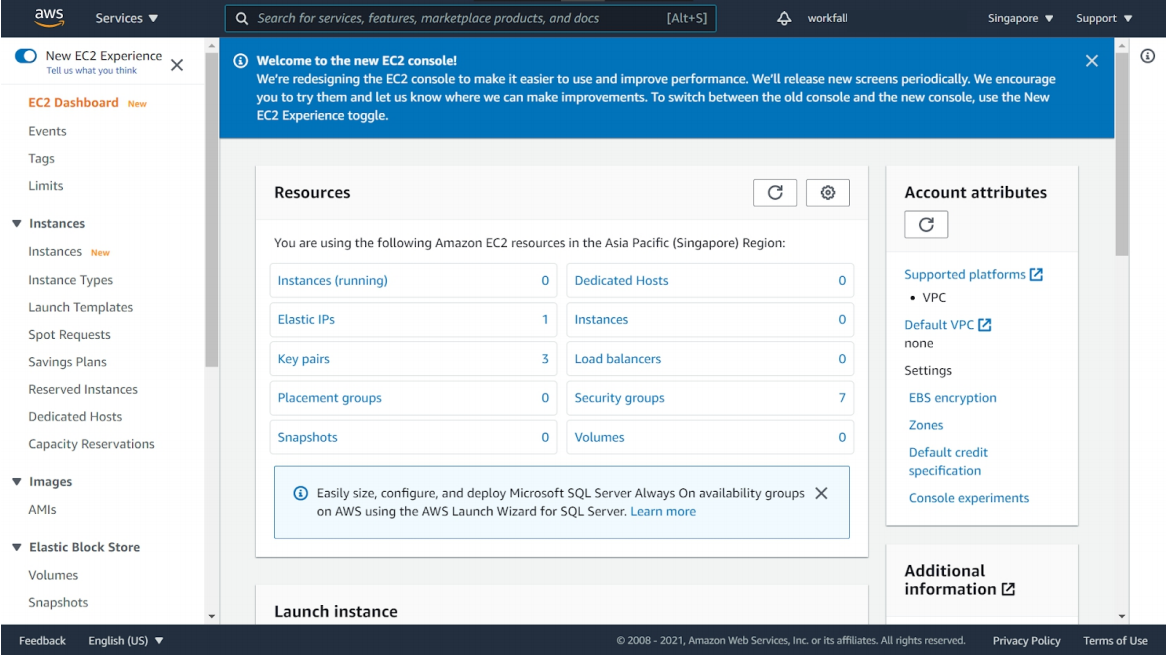
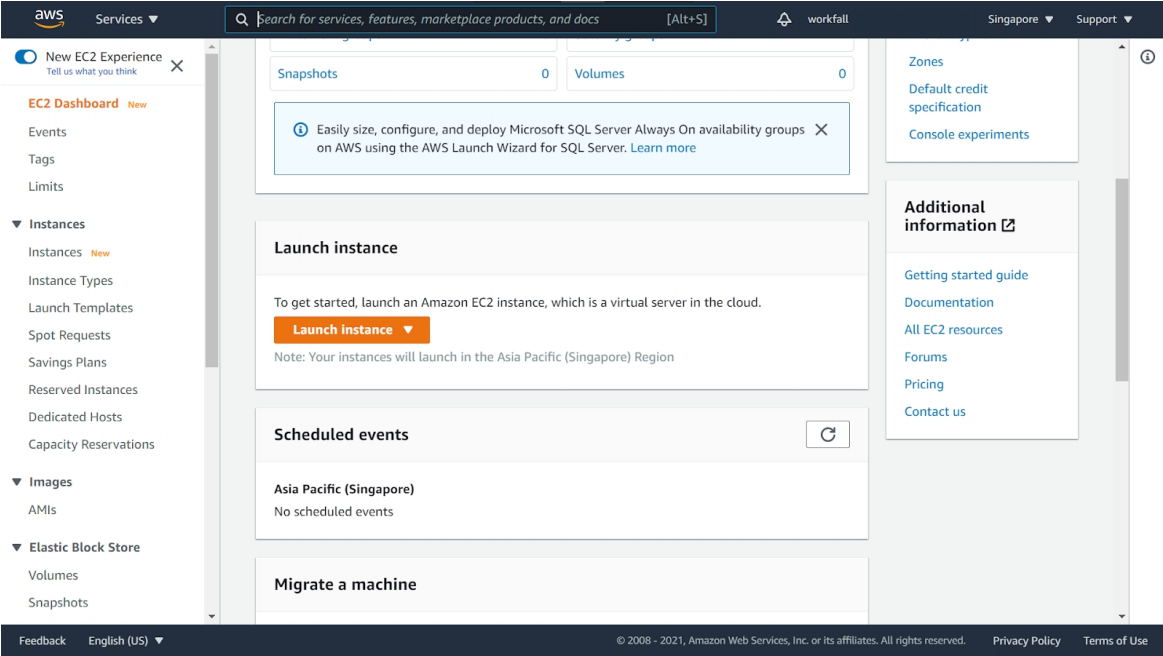
Scroll down on the EC2 Dashboard console and click on “Launch instance” to launch a new managed instance in your preferred region.
Under “Choose and Amazon Machine Image (AMI), select “Amazon Linux 2 AMI (64-bit)” and click on “Select”.

In Step 2, you can select the instance type you prefer. For this tutorial, we will be using “t2.micro”. Click on “Next: Configure Instance Details”.

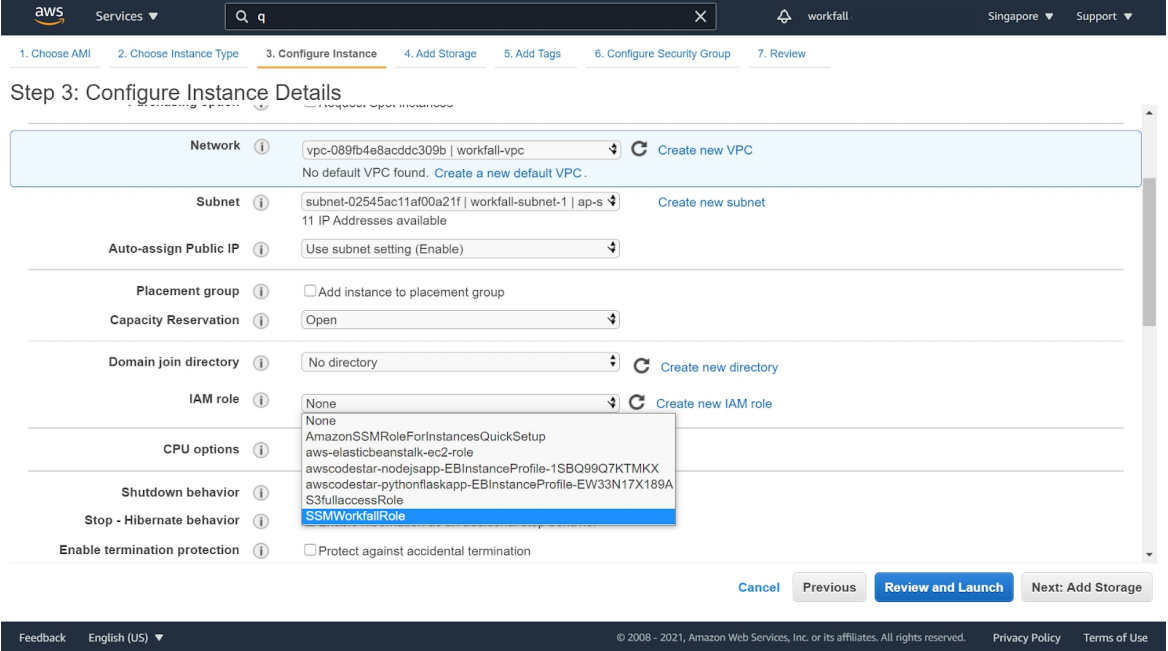
Ensure that the “Subnet” selected is the one for which you enabled the auto-assigning of public IPv4 addresses.
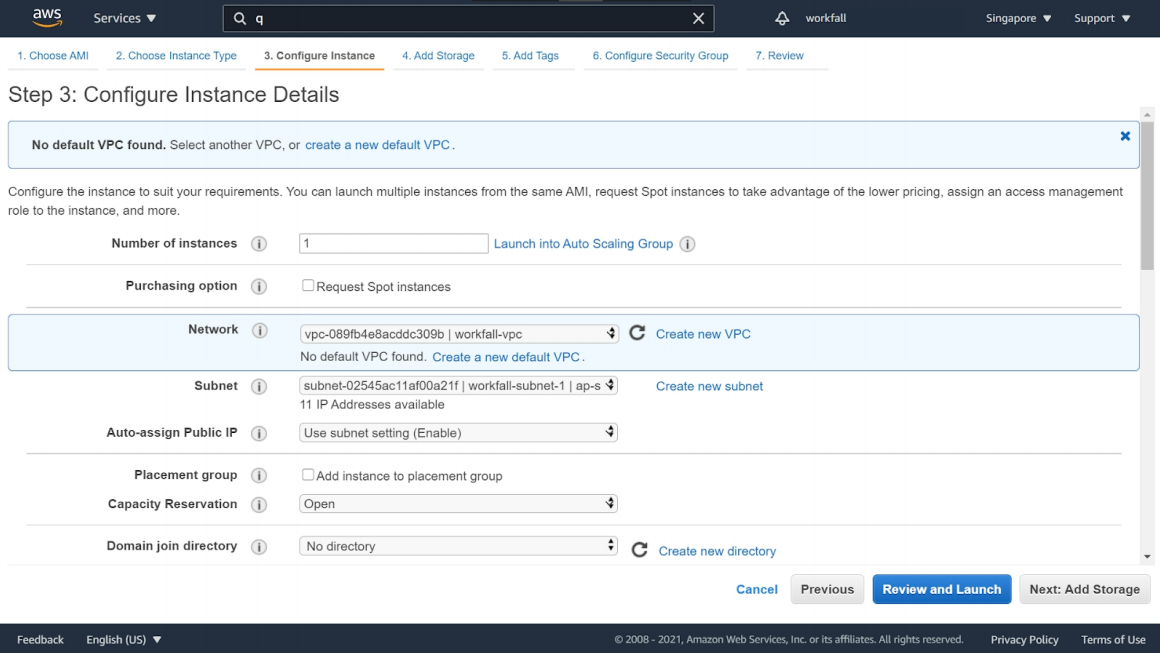
Scroll down and for the “IAM role”, select the role you created above and click on “Next: Add Storage”.
You can make changes in the storage configuration depending on your requirements. For this tutorial, we will be using the default storage configuration. Once done, click on “Next: Add tags”.

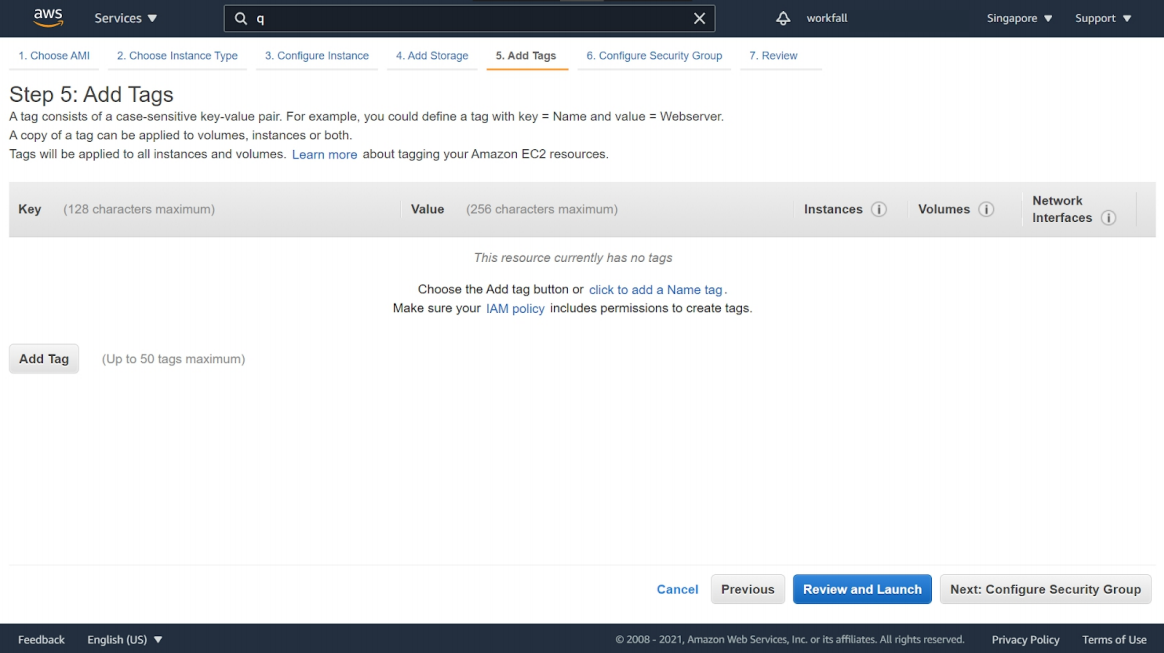
Add tags (if any) for your instance. We will not be adding any tags in this tutorial for our instance. Click on “Next: Configure Security Group”.
Ensure that the inbound SSH rule with TCP protocol is open on Port 22. Click on “Review and Launch”.

Review all the configuration details and click on “Launch”.

For key pairs, from the dropdown, select an existing or create a new key pair based on your requirements. You can also proceed without a key pair. In this tutorial, we will not be creating a key pair. Once done, click on “Launch Instances”.

On success, you will view a screen as shown below. Click on “View Instances”.

You will see the newly created instance in the list shown below. Ensure that the “Public IPv4 DNS” column has an IP address for your newly created instance.

Once the “Instance State” changes to the “Running” state, select the newly created instance and click on “Actions”. Select “Connect” from the dropdown.
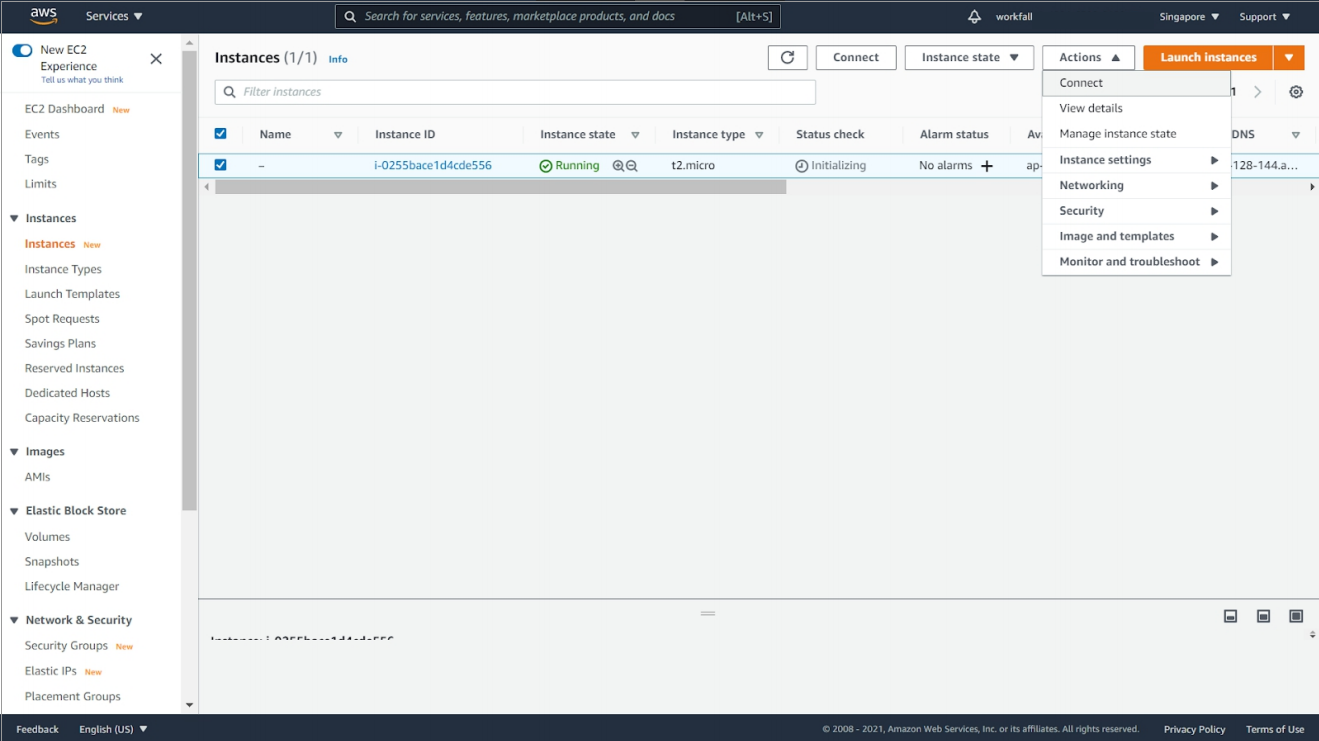
Enter a “User name” for your instance and click on “Connect” to connect to your EC2 instance.

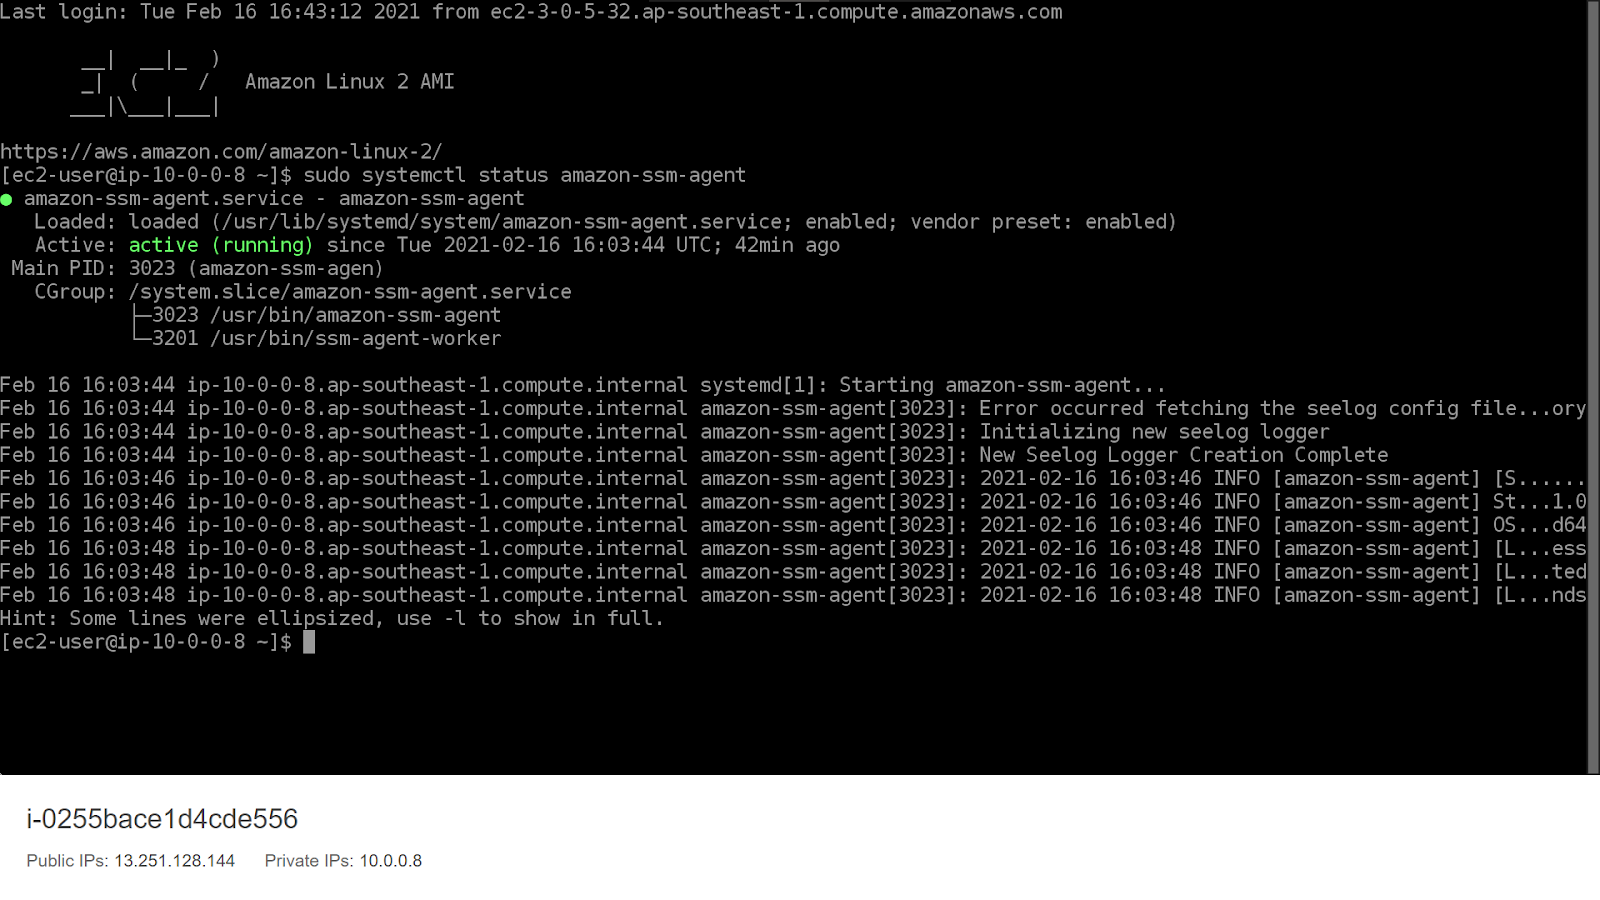
A new terminal console will open in a new tab as shown below.

Type in the command “sudo systemctl status amazon-ssm-agent” in the terminal and hit enter. This command is to check if the SSM-agent is installed properly on your EC2 instance. Id the Active status shows as “active (running)”, it can be assured that the SSM-agent is successfully installed.
Once you have an EC2 instance running the Systems Manager agent, you can automate many configurations or upgradation or any such tasks and manage the instance. Now, let’s upgrade the SSM agent installed on your instance. This can be done by running a pre-packaged command which is known as a document or automating the upgradation process.
Navigate to the Amazon Systems Manager console on AWS.

For automated upgradation of the SSM agent:
Click on “Fleet Manager” under the “Node Management” section in the left navigation pane. You will find your created managed EC2 instance in the list as shown below.

To automate the upgradation, click on “Account Management” and then, click on “Auto-update SSM agent”.

Once done, a modal will appear. Click on “Auto-update SSM agent” and after a few minutes, the update will be automated for any existing or new instances you create.

For manually updating the SSM-agent using a pre-packaged command:
Click on “Run Command” under the “Node Management” section in the left navigation pane.
Now, click on “Run command” to upgrade the SSM-agent manually.

In the search bar, click in it and select “Document name prefix”, then click on “Equals” and then type in “AWS-UpdateSSMAgent”.
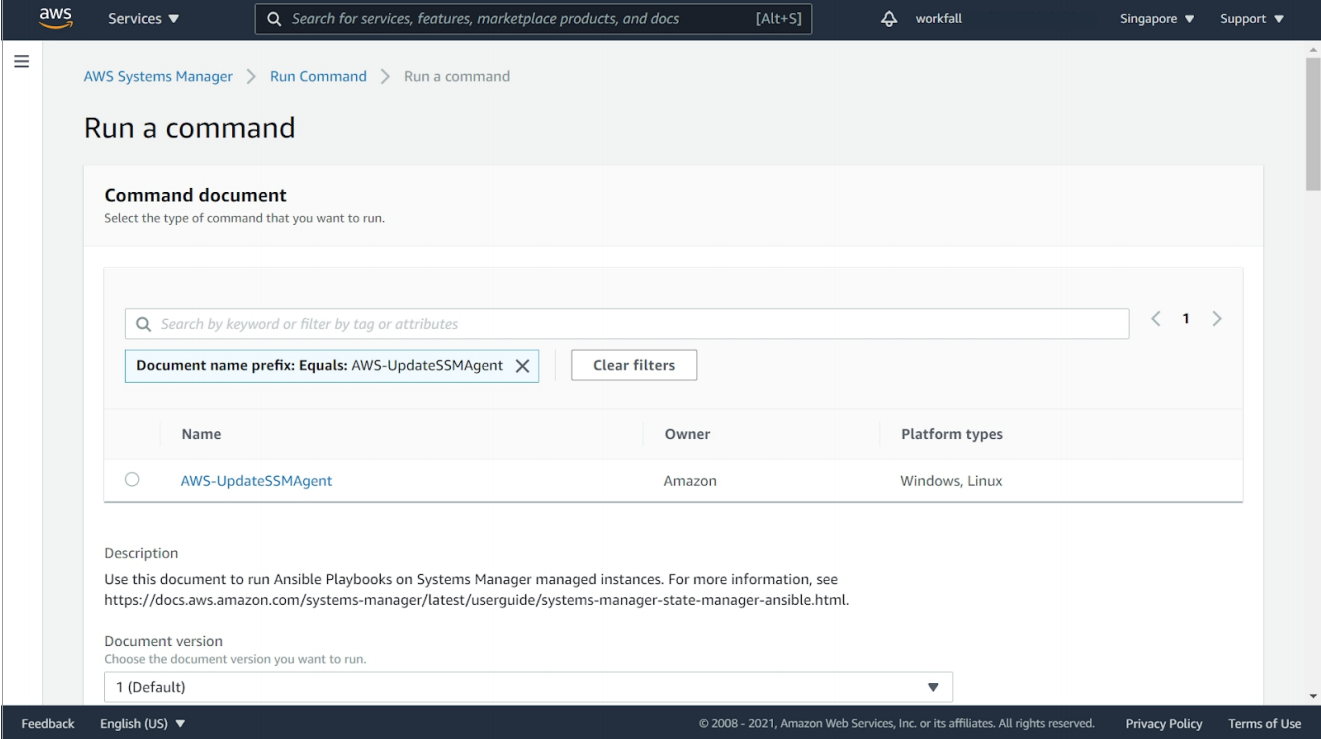
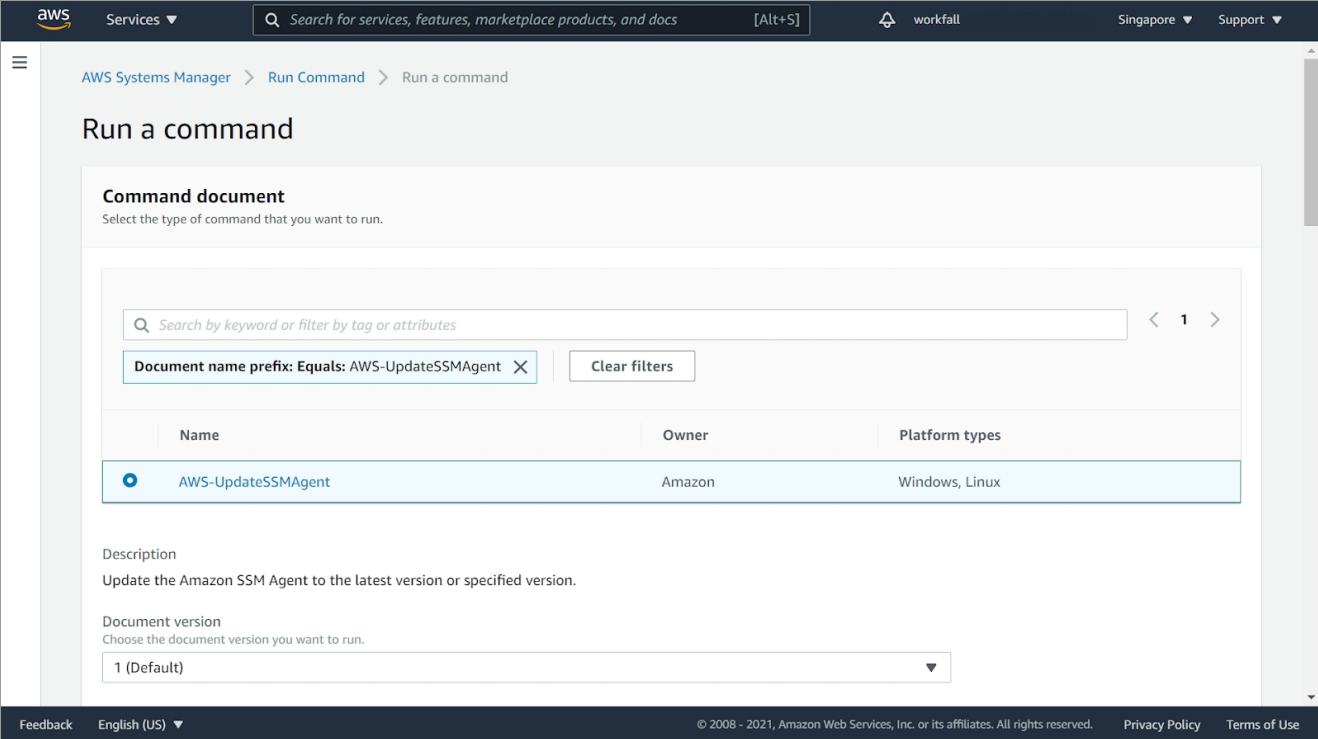
Now, click on the radio button on the left of “AWS-UpdateSSMAgent”. This is known as the document and this will upgrade the Systems Management agent on the selected instance.
Once done, scroll down to the “Targets” section on the same page and select the radio button on the left of “Choose instances manually” then select the managed EC2 instance you created above from the list of instances displayed.

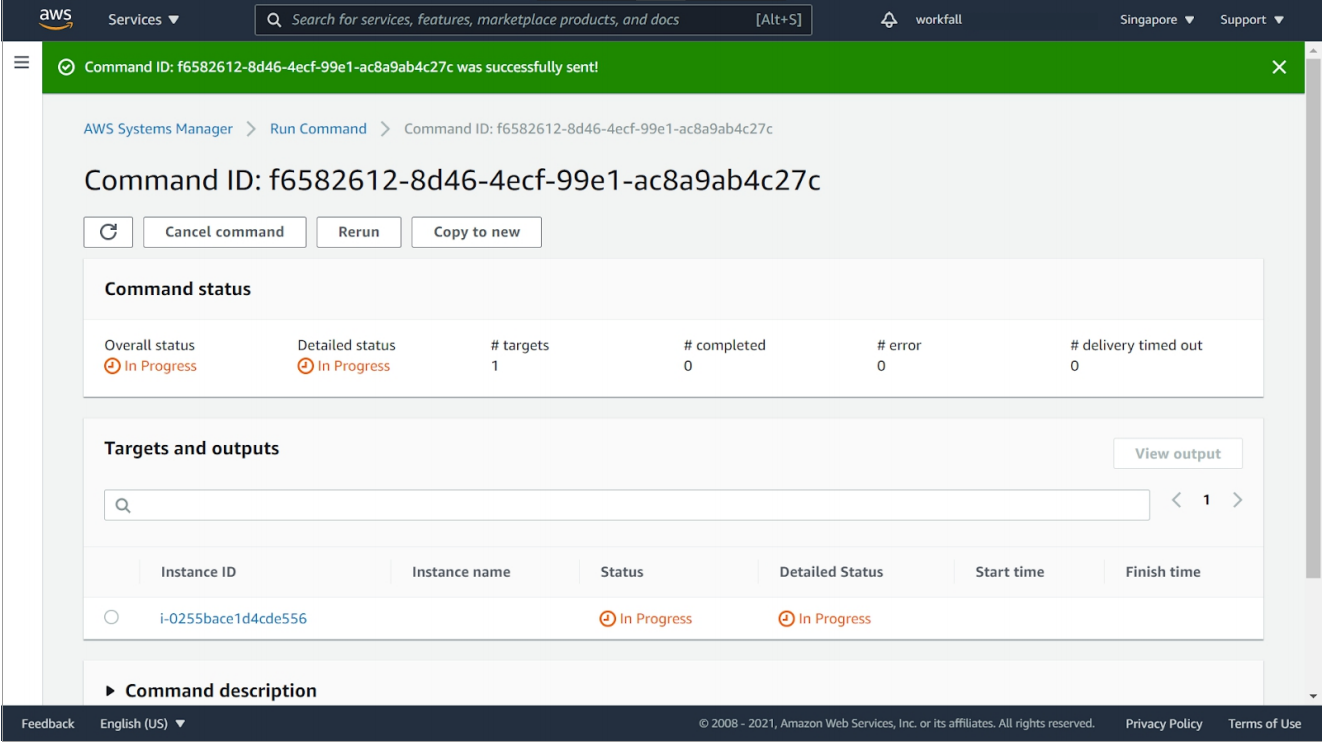
Scroll down and click on “Run” to execute the document.

You will see the “Overall Status” as “In Progress”.
After a few minutes, hit refresh and the status will change to “Success”.
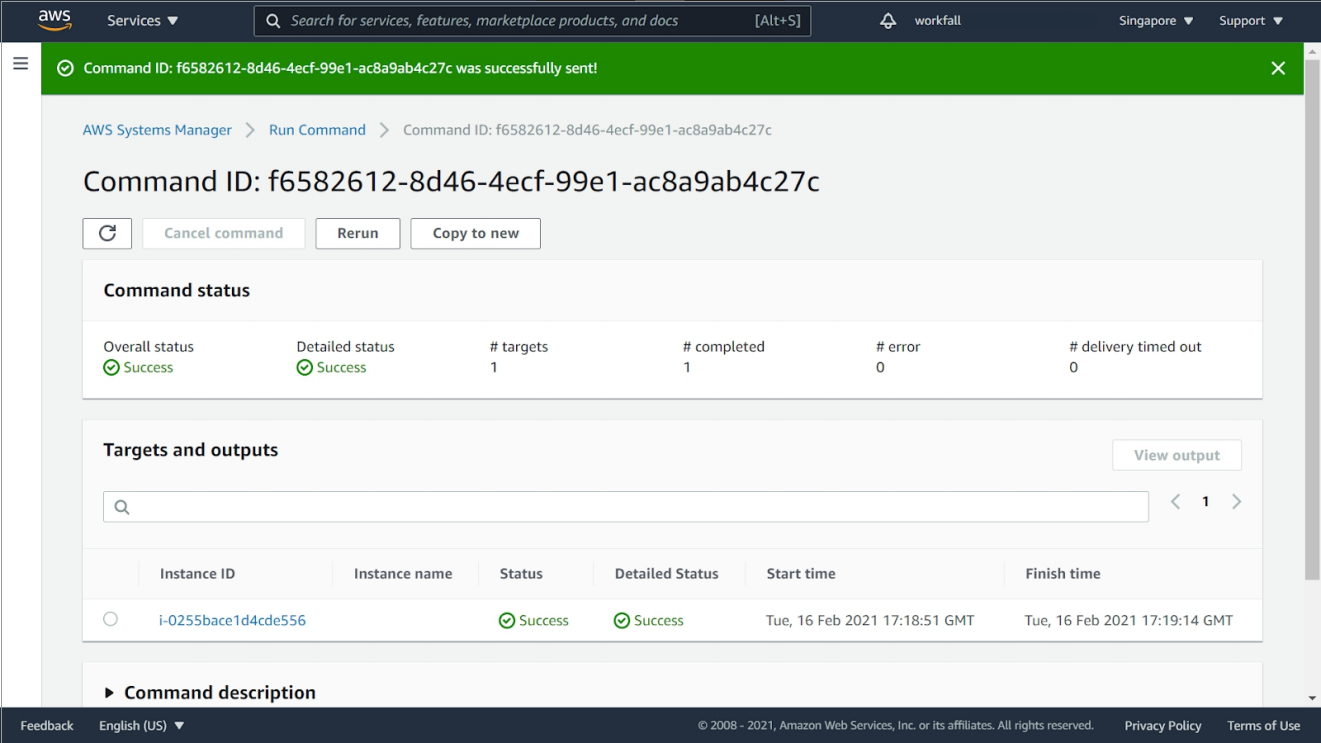
To view the output of the command execution, click on your managed EC2 instance displayed under the “Targets and outputs” section.

Expand “Step 1 – Output” to view the output.

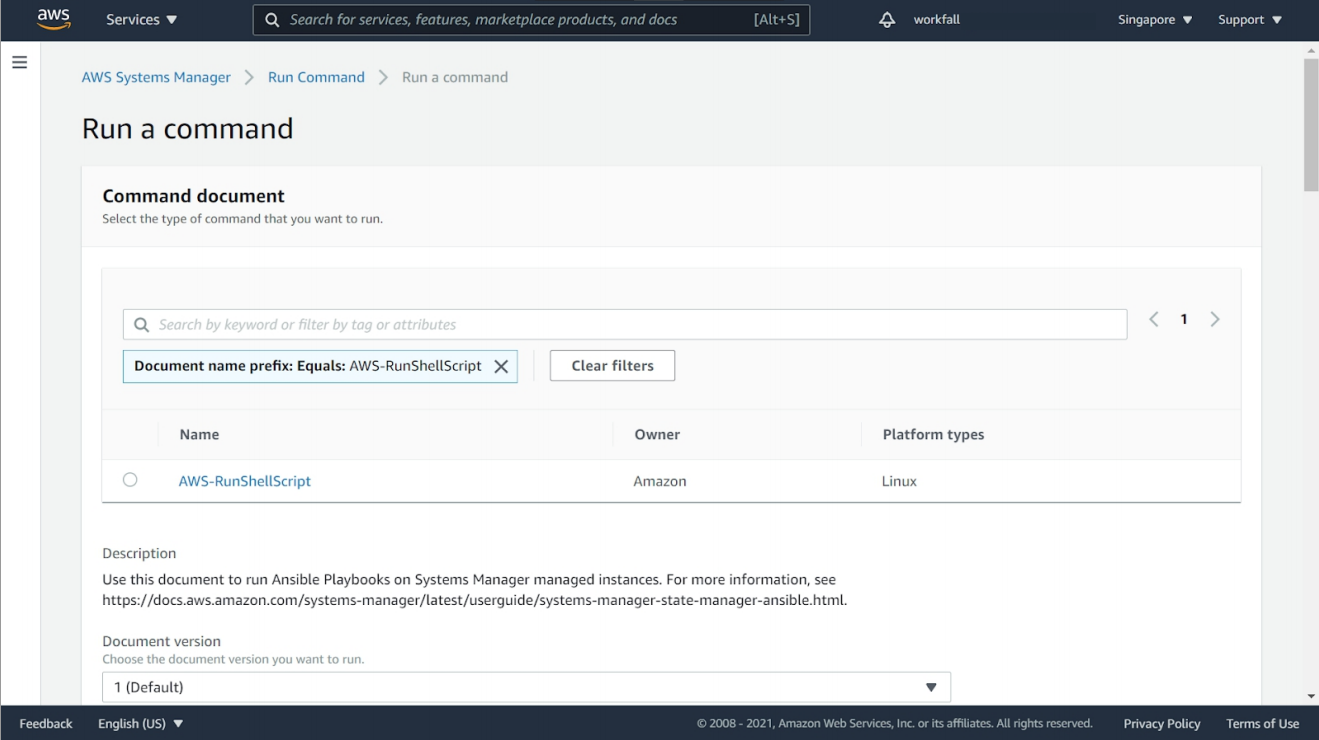
Now, to run a remote shell script for upgrading any packages on your EC2 instance, navigate back to the “Run Command” dashboard in Amazon Systems Manager and click on “Run Command”. In the search bar, click in it and select “Document name prefix”, then click on “Equals” and then type in “AWS-RunShellScript”.
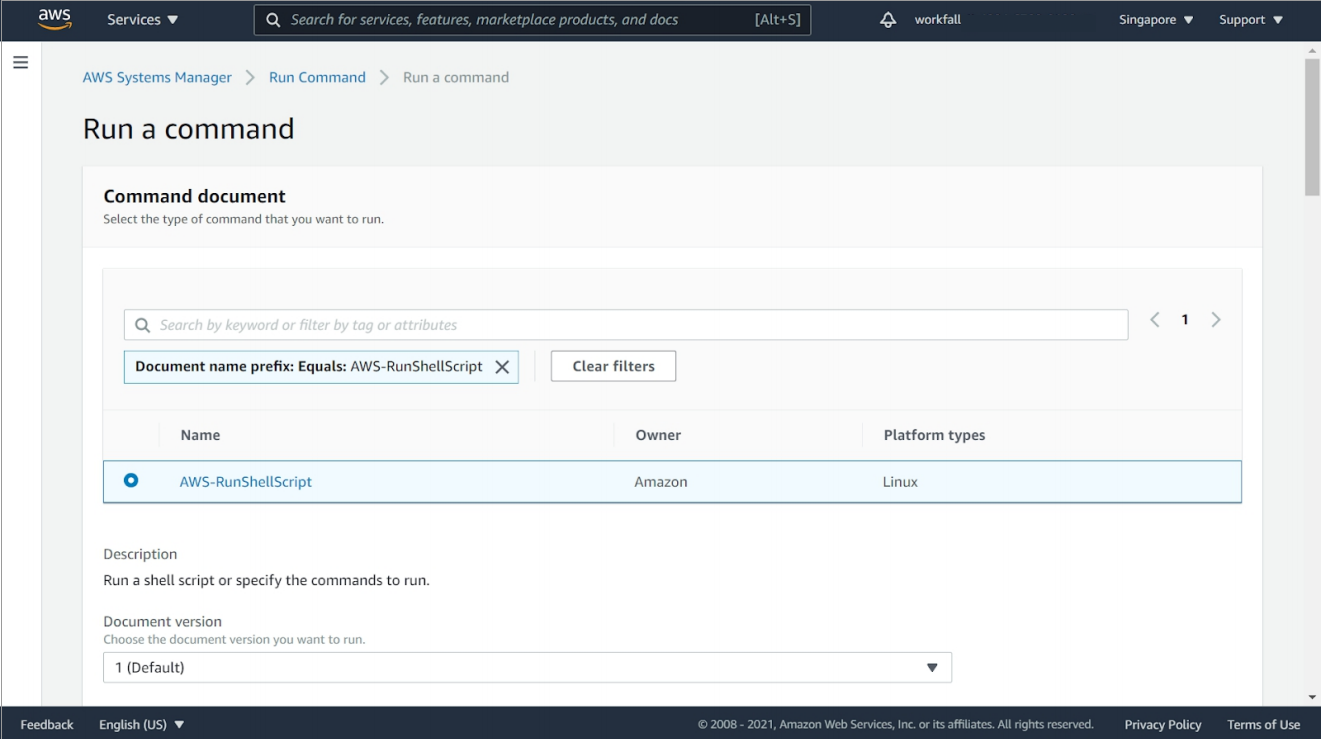
Now, click on the radio button on the left of “AWS-RunShellScript”.
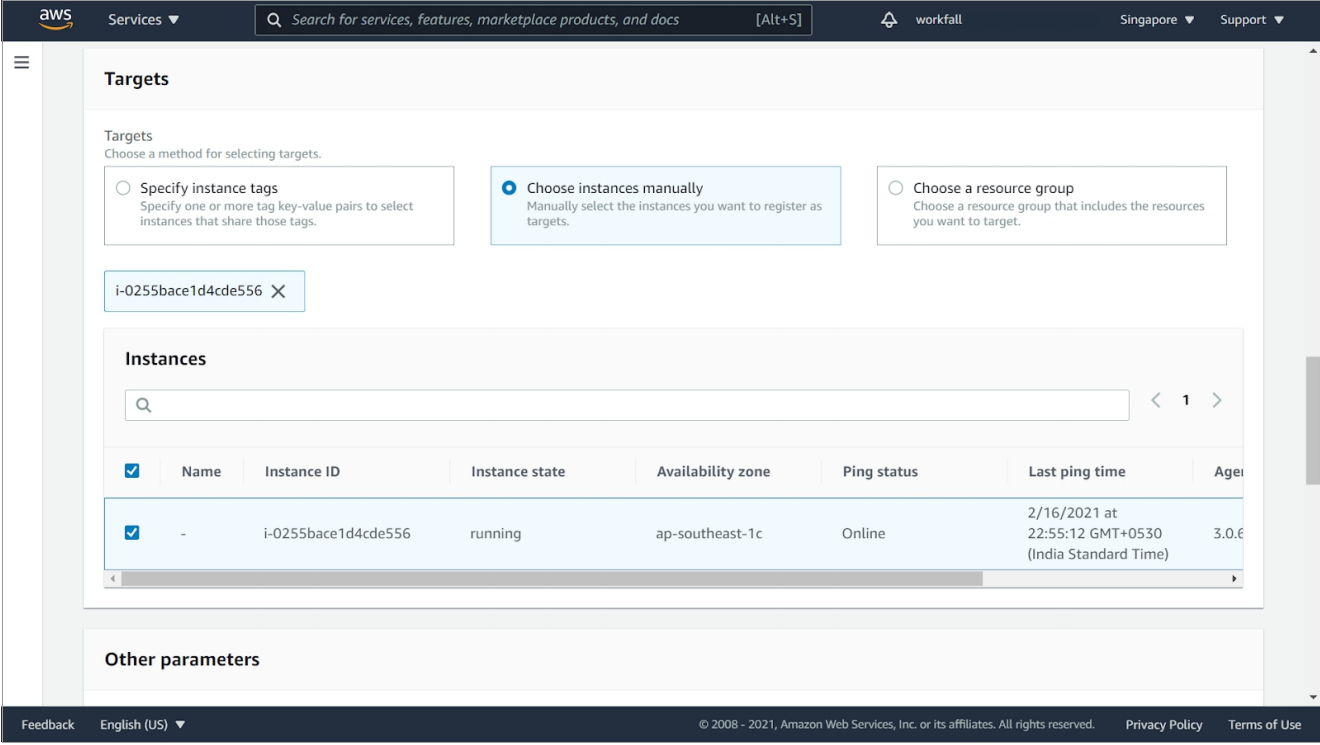
Once done, scroll down to the “Targets” section on the same page and select the radio button on the left of “Choose instances manually” then select the managed EC2 instance you created above from the list of instances displayed.
Scroll up to the “Command Parameters” section and insert the following command in the Commands text box: “sudo yum update -y”

Scroll down and click on “Run” to execute the command.

After a few minutes, hit refresh and the status will be updated to “Success” on successful completion of execution of the command.

Finally, to view the output of the command execution, click on your managed EC2 instance displayed under the “Targets and outputs” section.

Conclusion:
In this blog, we have explored that AWS Systems Manager has the ability to automate tasks and helps in keeping all our EC2 instances healthy, and applications managed, secure, and updated. We have also seen how we can make use of Amazon Systems Manager to execute a bunch of commands remotely on EC2 instances eliminating the need for SSH or bastion hosts. We will discuss more of Amazon Systems Manager and its other configurations in our upcoming blog. Stay tuned to keep getting all updates about our upcoming new blogs on AWS and relevant technologies.
Meanwhile …
Keep Exploring -> Keep Learning -> Keep Mastering
This blog is part of our effort towards building a knowledgeable and kick-ass tech community. At Workfall, we strive to provide the best tech and pay opportunities to AWS-certified talents. If you’re looking to work with global clients, build kick-ass products while making big bucks doing so, give it a shot at workfall.com/partner today.


